

처음부터 차근차근
RxJava 본문
Progress Dialog
<?xml version="1.0" encoding="utf-8"?>
<LinearLayout xmlns:android="http://schemas.android.com/apk/res/android"
    xmlns:app="http://schemas.android.com/apk/res-auto"
    xmlns:tools="http://schemas.android.com/tools"
    android:layout_width="match_parent"
    android:layout_height="match_parent"
    android:orientation="vertical"
    tools:context=".MainActivity">

    <Button
        android:id="@+id/btnProgress"
        android:layout_width="wrap_content"
        android:layout_height="wrap_content"
        android:onClick="onClick"
        android:text="자료조회"/>

</LinearLayout>
public class MainActivity extends AppCompatActivity {
Disposable backgroundTask;
@Override
protected void onCreate(Bundle savedInstanceState) {
super.onCreate(savedInstanceState);
setContentView(R.layout.activity_main);
}
public void onClick(View view) {
runRx();
}
private void runRx() {
ProgressDialog asyncDialog = new ProgressDialog(this);
asyncDialog.setProgressStyle(ProgressDialog.STYLE_HORIZONTAL);
asyncDialog.setMessage("로딩중입니다..");
asyncDialog.show();
Observable obs = Observable.fromCallable(() -> {
try {
for (int i = 0; i < 6; i++) {
asyncDialog.setProgress(i * 20);
Thread.sleep(3 * 1000);
Log.d("fromCallable", "____________________________________ " + i);
}
} catch (InterruptedException e) {}
return "ok";
});
backgroundTask = obs.subscribeOn(Schedulers.io()).observeOn(AndroidSchedulers.mainThread()).subscribe(new Consumer<String>() {
@Override
public void accept(String result) {
Log.d("accept", "____________________________________ " + result);
asyncDialog.dismiss();
backgroundTask.dispose();
}
});
}
}

알림 기능
알림기능이란
알림기능(notification)은 어떤 이벤트가 발생하였을 때, 앱이 사용자에게 전달하는 메시지이다.
알림 만드는 절차
1. 알림 채널 생성하기
String NOTIFICATION_CHANNEL_ID = "my_channel_id_01";

private void createNotificationChannel() {

    if (Build.VERSION.SDK_INT >= Build.VERSION_CODES.O) {
        NotificationChannel notificationChannel = new NotificationChannel(NOTIFICATION_CHANNEL_ID, "My Notifications", NotificationManager.IMPORTANCE_DEFAULT);
        notificationChannel.setDescription("Channel description");
        NotificationManager notificationManager = (NotificationManager) getSystemService(Context.NOTIFICATION_SERVICE);
        notificationManager.createNotificationChannel(notificationChannel);
    }
}
2. 알림 빌더를 생성한다.
NotificationCompat.Builder builder = new NotificationCompat.Builder(this);
3. 알림 속성을 설정한다.
builder.setSmallIcon(R.drawable.notification_icon);
builder.setContentTitle("알려드립니다.");
builder.setContentText("이것은 시험적인 알림입니다.");
4. 액션을 첨부한다.(선택 사양)
Intent intent = new Intent(Intent.ACTION_VIEW, Uri.parse("http://www.google.com/"));
PendingIntent pendingIntent = PendingIntent.getActivity(this, 0, 	intent, 0);
builder.setContentIntent(pendingIntent);
5. 알림 객체 생성하여 보내기
NotificationManager notificationManager = (NotificationManager)getSystemService(NOTIFICATION_SERVICE);
notificationManager.notify(NOTIFICATION_ID, builder.build());
버튼을 누르면 알람을 보내는 앱
먼저 아이콘 생성
app \ src \ main \ res \ drawable 에다 new -> ImageAsset 클릭

<?xml version="1.0" encoding="utf-8"?>
<LinearLayout xmlns:android="http://schemas.android.com/apk/res/android"
    xmlns:app="http://schemas.android.com/apk/res-auto"
    xmlns:tools="http://schemas.android.com/tools"
    android:layout_width="match_parent"
    android:layout_height="match_parent"
    android:orientation="vertical"
    tools:context=".MainActivity">

    <Button
        android:id="@+id/btnAlarm"
        android:layout_width="match_parent"
        android:layout_height="wrap_content"
        android:onClick="onClick"
        android:text="알람생성"/>

</LinearLayout>
public class MainActivity extends AppCompatActivity {
String NOTIFICATION_CHANNEL_ID = "my_channel_id_01";
@Override
protected void onCreate(Bundle savedInstanceState) {
super.onCreate(savedInstanceState);
setContentView(R.layout.activity_main);
createNotificationChannel();
}
private void createNotificationChannel() {
if (Build.VERSION.SDK_INT >= Build.VERSION_CODES.O) {
NotificationChannel notificationChannel = new NotificationChannel(NOTIFICATION_CHANNEL_ID, "My Channel", NotificationManager.IMPORTANCE_DEFAULT);
notificationChannel.setDescription("My Notifications");
NotificationManager notificationManager = (NotificationManager) getSystemService(Context.NOTIFICATION_SERVICE);
notificationManager.createNotificationChannel(notificationChannel);
}
}
public void onClick(View view) {
NotificationCompat.Builder notificationBuilder = new NotificationCompat.Builder(this, NOTIFICATION_CHANNEL_ID);
// 알림이 클릭되면 이 인텐트가 보내진다.
Intent intent = new Intent(Intent.ACTION_VIEW, Uri.parse("http://www.google.com/"));
PendingIntent pendingIntent = PendingIntent.getActivity(this, 0, intent, 0);
notificationBuilder.setSmallIcon(R.drawable.ic_arlarm)
.setContentTitle("메일 알림")
.setContentText("새로운 메일이 도착하였습니다.")
.setContentIntent(pendingIntent);
NotificationManager notificationManager = (NotificationManager) getSystemService(Context.NOTIFICATION_SERVICE);
notificationManager.notify(1, notificationBuilder.build());
}
}


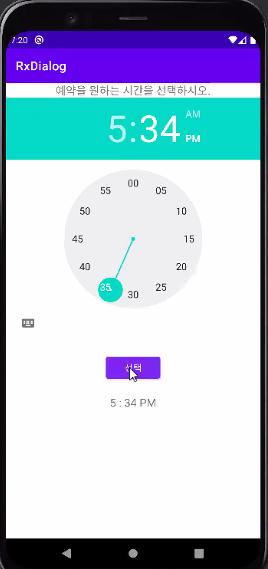
예약 앱
<?xml version="1.0" encoding="utf-8"?>
<LinearLayout xmlns:android="http://schemas.android.com/apk/res/android"
    xmlns:app="http://schemas.android.com/apk/res-auto"
    xmlns:tools="http://schemas.android.com/tools"
    android:layout_width="match_parent"
    android:layout_height="match_parent"
    android:orientation="vertical"
    tools:context=".MainActivity">

    <TextView
        android:id="@+id/textView2"
        android:layout_width="wrap_content"
        android:layout_height="wrap_content"
        android:layout_gravity="center"
        android:text="예약을 원하는 시간을 선택하시오."
        android:textAppearance="?android:attr/textAppearanceMedium" />

    <TimePicker
        android:id="@+id/timePicker1"
        android:layout_width="wrap_content"
        android:layout_height="wrap_content"
        android:layout_marginBottom="24dp" />

    <Button
        android:id="@+id/set_button"
        android:layout_width="wrap_content"
        android:layout_height="wrap_content"
        android:layout_gravity="center"
        android:onClick="displayTime"
        android:text="선택"/>

    <TextView
        android:id="@+id/textView3"
        android:layout_width="wrap_content"
        android:layout_height="wrap_content"
        android:text="선택된 시간"
        android:layout_marginTop="20sp"
        android:textAppearance="?android:attr/textAppearanceMedium"
        android:layout_gravity="center"/>


</LinearLayout>
public class MainActivity extends AppCompatActivity {
private TimePicker timePicker1;
private TextView time;
private Calendar calendar;
private String format = "";
@Override
protected void onCreate(Bundle savedInstanceState) {
super.onCreate(savedInstanceState);
setContentView(R.layout.activity_main);
timePicker1 = (TimePicker) findViewById(R.id.timePicker1);
time = (TextView) findViewById(R.id.textView3);
calendar = Calendar.getInstance(TimeZone.getTimeZone("Asia/Seoul"), Locale.KOREA);
int hour = calendar.get(Calendar.HOUR_OF_DAY);
int min = calendar.get(Calendar.MINUTE);
timePicker1.setHour(hour);
timePicker1.setMinute(min);
showTime(hour, min);
}
public void displayTime(View view) {
int hour = timePicker1.getHour();
int min = timePicker1.getMinute();
showTime(hour, min);
}
public void showTime(int hour, int min) {
if (hour == 0) {
hour += 12;
format = "AM";
} else if (hour == 12) {
format = "PM";
} else if (hour > 12) {
hour -= 12;
format = "PM";
} else {
format = "AM";
}
time.setText(new StringBuilder().append(hour).append(" : ").append(min)
.append(" ").append(format));
}
}
출처 : 안드로이드프로그래밍(22-1학기)김용남교수 강의 내용 변형 및 요약
'프로그래밍 > Android' 카테고리의 다른 글
| Splash 화면 만들기 (0) | 2022.06.03 |
|---|---|
| 안드로이드 그래픽 (0) | 2022.05.30 |
| Reactive programming(수정) (1) | 2022.04.22 |
| 팝업 메뉴 (1) | 2022.04.19 |
| Android 메뉴 (0) | 2022.04.12 |
'프로그래밍/Android' Related Articles
more


Comments